Named Colors
Named Colors are project specific. You can name a color and give it a description.
Each project has its own Named Colors. These project-level Named Colors are included in your project just like all your other settings, notes, progress, etc.
There are three ways to create Named Colors.
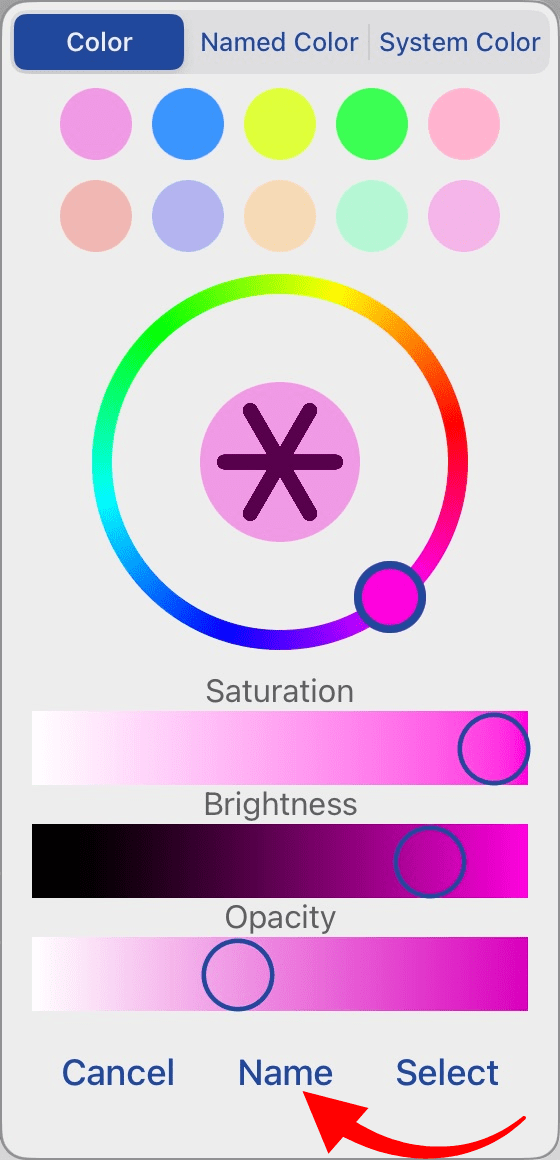
- From the Color Picker, tap Name at the bottom.
Show Me
On some screen configurations you may need to scroll down. - Set the Color, Saturation, Brightness, and Opacity. Show Me
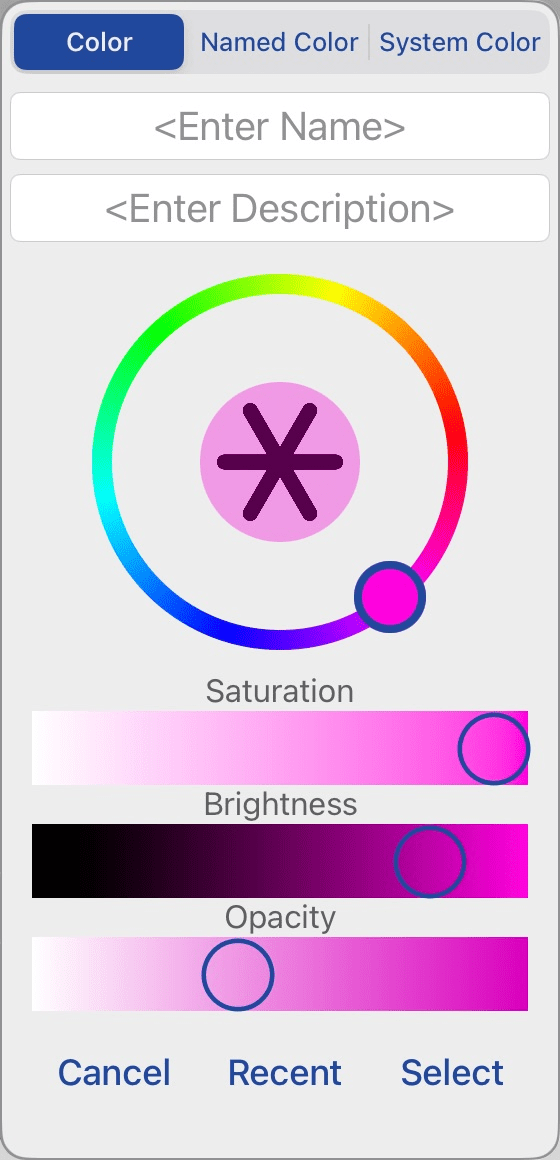
- Enter a Name and Description in the fields at the top. The Description field is optional. To enter a multi-line description, see Edit > Named Colors. About Named Color Descriptions.
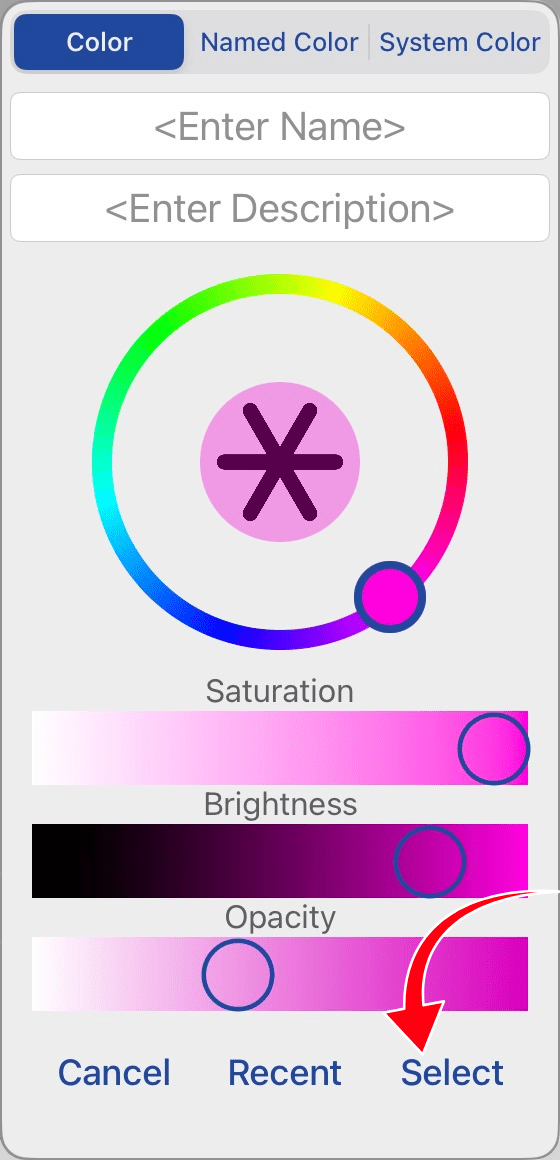
Pro Tip: Toggle back to view recent colors by tapping Recent at the bottom. - Tap Select at the bottom. The current color is saved as a Named Color in your project. Show Me
- Tap Edit.

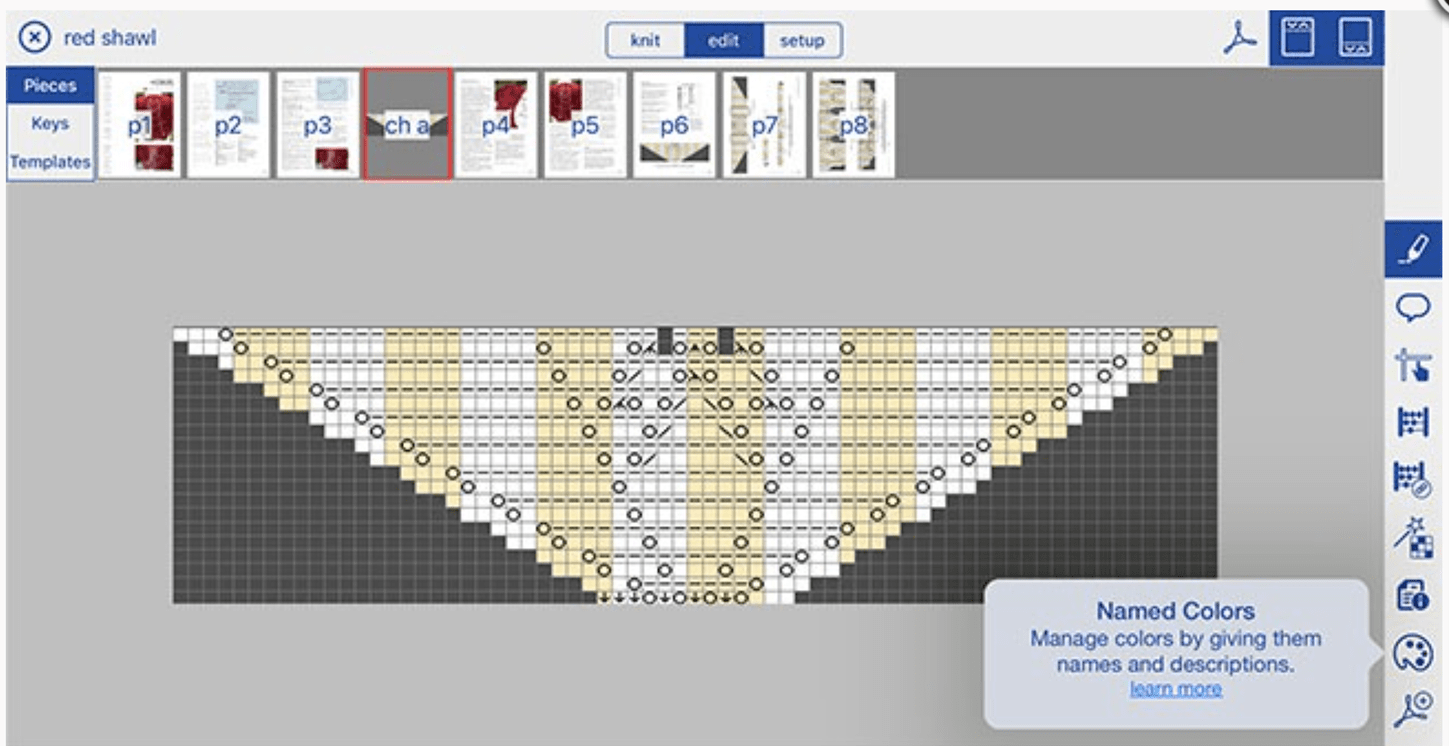
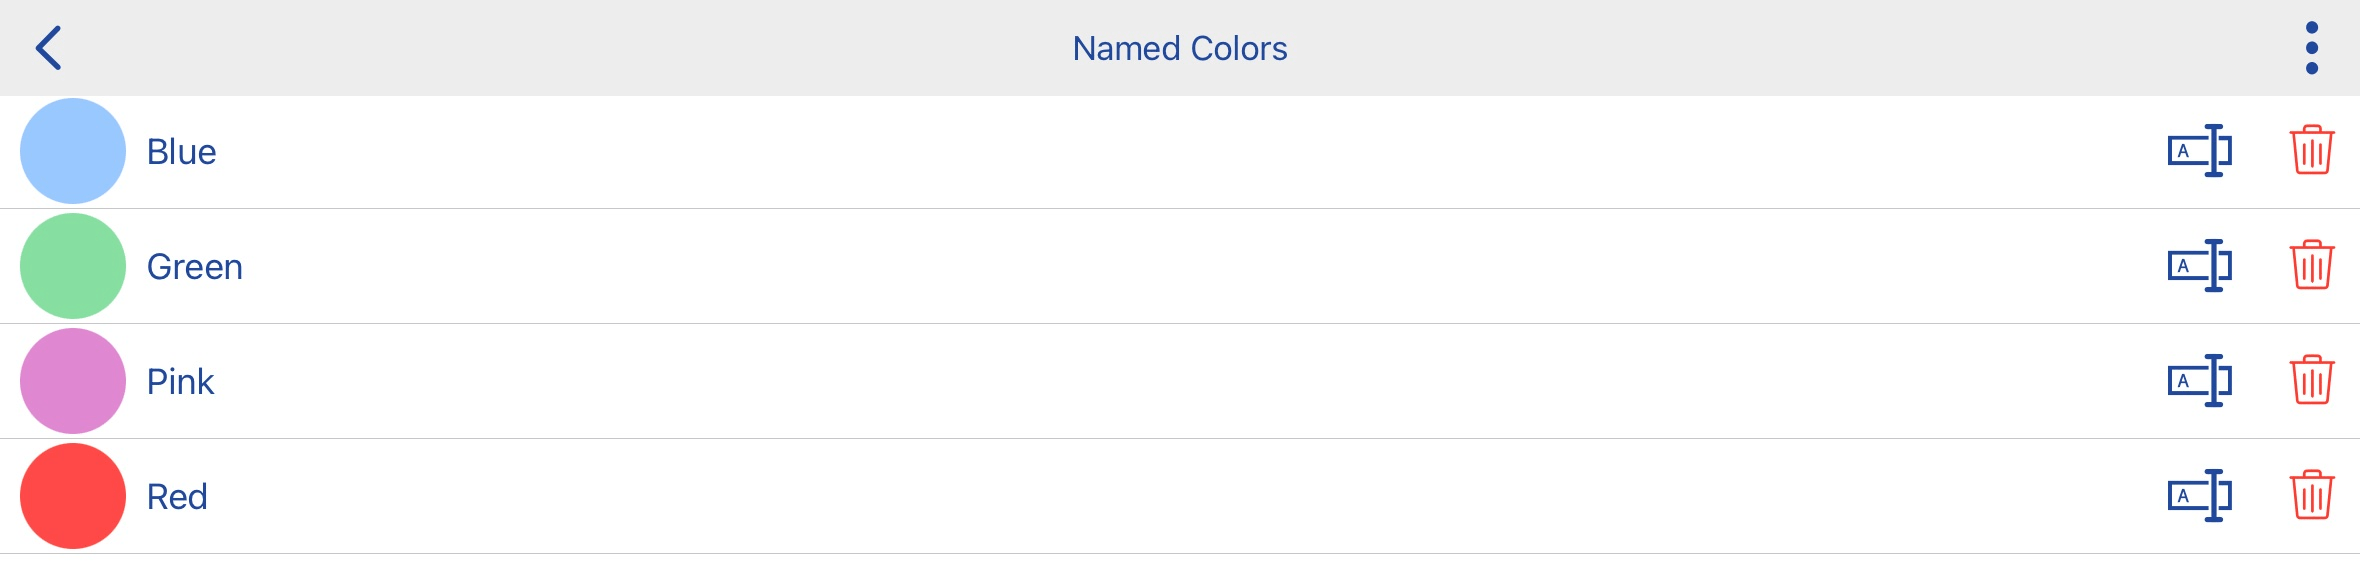
- Tap Named Colors on the right. Show Me
- Tap the 3 dots at the upper right and select Make New Color.
Show Me
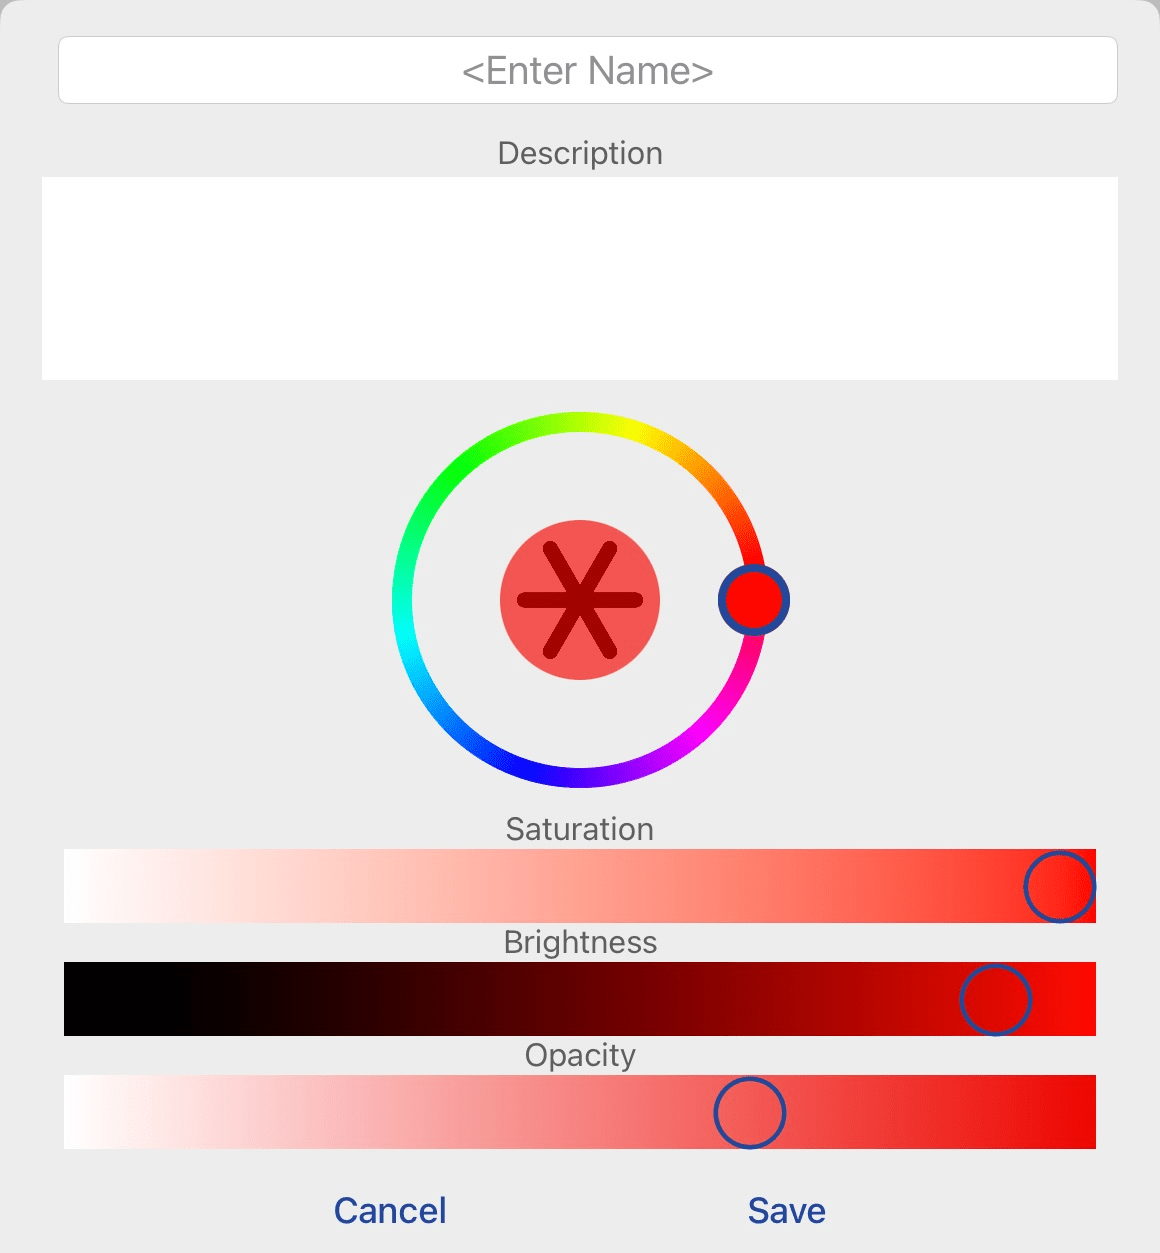
- Set the Color, Saturation, Brightness, and Opacity.
Show Me
A sample of your color appears in the center of the Color Wheel. - Enter a Name and Description in the fields at the top. The Description field is optional and may contain multiple lines to help differentiate steps. About Named Color Descriptions.
- Tap Save. The current color is saved as a Named Color in your project. Show Me
System colors are named colors that are stored outside your project so they can be used across projects. Learn more about system colors here.
To use a System Color in your project:
- Open the Color Picker and tap System Color at the top.
- Optionally, select the appropriate category.
- Tap the desired System Color.
The System Color is added to your project and is now a Named Color in your project.
If you add a System Color to your project, it becomes a Named Color within your project.
- If you change a System Color, it does NOT impact the project’s Named Color.
- If you change a Named Color within your project, it will NOT impact the System Color.
- Tap Edit.
- Tap Named Colors on the right. Show Me
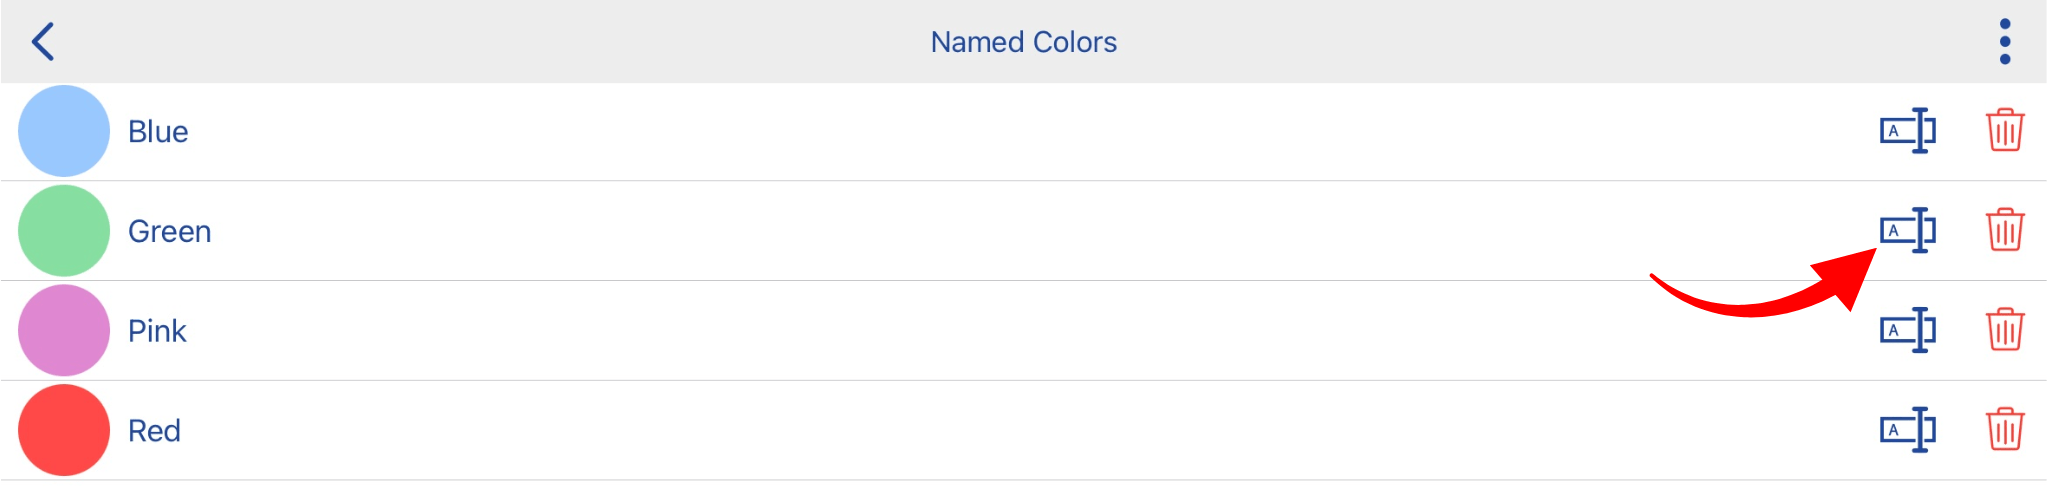
- Tap
 next to the color you want to edit.
Show Me
next to the color you want to edit.
Show Me
- Make your modifications. Show Me
- Tap Save.
Changes to Named Colors will be reflected across your project.
For example, if you change the k2tog color from red to purple, all the places that k2tog is used within the project will show the new purple color.